
Why Drywall Anchoring Blunders Are Wrecking Your Walls
There is nothing quite as disheartening as watching a beloved shelf, mirror, or piece of art come crashing down, taking a chunk of your plaster with it. Most homeowners blame bad luck, but the truth is far more mechanical: drywall anchoring blunders are the silent culprits behind nearly every crater-sized hole in a living room wall.
Understanding how your walls are actually constructed, and how hardware interacts with that structure, is the difference between a secure installation and a Saturday afternoon spent patching drywall. This guide walks through the most common mistakes, the right tools for heavier loads, and how to avoid the repair cycle altogether.
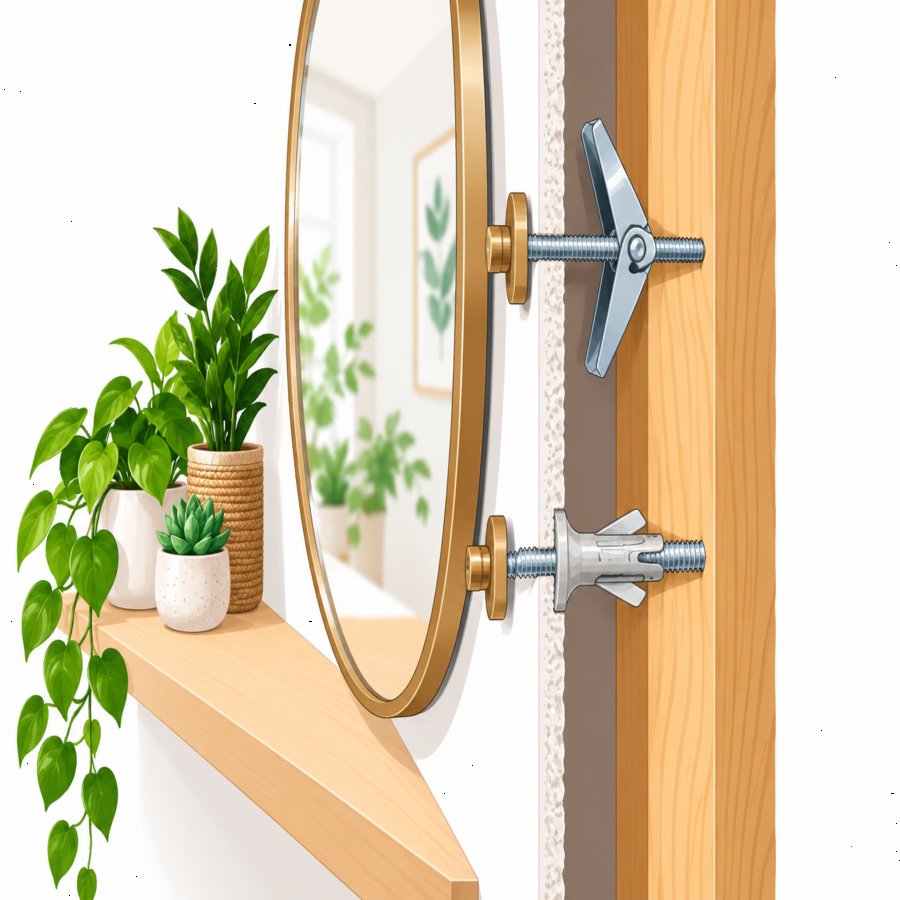
The Anatomy of a Wall: Why It Matters Before You Drill
Before diving into hardware, it helps to understand what you are actually drilling into. Modern homes typically use drywall, also known as gypsum board, which is a relatively soft and brittle material sandwiched between paper layers. Older homes, by contrast, often feature plaster over wooden lath, a much denser but more fragile system.
Drywall vs. Plaster: Know Your Enemy
Drywall sheets are usually only half an inch thick, which means there is very little material to grip an anchor. Plaster walls, found in many pre-1950s houses, have a hard shell that can crack unpredictably if you force a standard anchor into it without the right preparation.
This is precisely where many drywall anchoring blunders begin. People assume every wall behaves the same way, grab whatever anchor is in the junk drawer, and drill without ever locating a stud or checking the wall’s composition.
The Five Most Common Drywall Anchoring Blunders
Let’s break down the specific errors that lead to gaping holes, stripped anchors, and wobbly shelves. Recognizing these patterns in your own habits is the first step toward permanently fixing them.
1. Ignoring Wall Anchor Weight Limits
Every anchor on the market is rated for a specific load, yet almost nobody checks the packaging before buying. Exceeding wall anchor weight limits is arguably the single biggest reason decorative items end up on the floor.
A plastic expansion anchor rated for ten pounds has no business holding a forty-pound mirror. Always add a safety margin of at least twenty-five percent above the actual item weight when selecting hardware.
2. Using the Wrong Anchor for the Wall Type
Plastic anchors designed for drywall are not interchangeable with the hardware needed for plaster or masonry. Driving a standard cone-shaped anchor into old plaster can crack the brittle coat, leaving a web of fractures around the hole.
3. Overdriving the Screw or Anchor
Cranking a screw too far compresses the gypsum core until the anchor simply spins in place, losing all grip. This is one of the most frustrating drywall anchoring blunders because the damage is invisible until the item is already hanging and starts to sag.
4. Drilling an Oversized Pilot Hole
A hole that is even slightly too large prevents the anchor from biting into the surrounding material. Instead of a snug friction fit, the anchor simply falls through, and now you have a hole with zero holding power.
5. Skipping the Stud Finder Entirely
Framing studs provide dramatically more holding strength than any anchor ever could. Skipping this five-minute scan is a shortcut that routinely backfires, especially for anything heavier than a picture frame.
Choosing the Right Heavy Mirror Wall Anchor
Mirrors are deceptively heavy, and glass combined with a frame can easily exceed thirty or forty pounds. Selecting the correct heavy mirror wall anchor is non-negotiable if you want that mirror to stay exactly where you hung it.
Self-Drilling Threaded Anchors
These metal or heavy-duty plastic anchors twist directly into drywall without a pilot hole, flaring out behind the panel to distribute weight across a wider area. They typically support fifty pounds or more per anchor, making them ideal for mid-sized mirrors and shelving.
Toggle-Style Anchors for Maximum Load
For the heaviest mirrors, floating shelves, or wall-mounted televisions, nothing beats a toggle mechanism that spreads load across the back side of the panel like a tiny bridge. Pair two toggle anchors with a mounting bracket and you create a load path that rivals hitting an actual stud.
French Cleats for Distributed Weight
A French cleat system, when anchored into at least one stud, distributes a mirror’s weight along a horizontal bar rather than concentrating it on two small points. This is a favorite among professional installers for oversized statement mirrors.
Toggle Bolts Plaster Installation: A Different Technique
Plaster walls demand a gentler, more deliberate approach than drywall. Using toggle bolts plaster installations correctly means respecting the material’s brittleness while still achieving a secure hold.
Step One: Score Before You Drill
Lightly score an X pattern with a utility knife at your marked point before drilling. This prevents the drill bit from skating across the hard, glossy surface and chipping a larger area than intended.
Step Two: Drill Slowly at Low Speed
High-speed drilling generates heat and vibration that fractures plaster. A slow, steady pace with light pressure lets the bit cut cleanly through both the plaster coat and the lath behind it.
Step Three: Fold and Insert the Toggle
Compress the spring-loaded wings, feed them through the hole, and tighten until you feel the toggle seat flush against the inside of the wall. Because plaster has no give, you will feel resistance almost immediately, which is actually a good sign of a solid hold.
Skipping these precautions is one of the most overlooked drywall anchoring blunders, even though it technically applies to plaster rather than drywall itself. Many homeowners simply don’t realize their century-old walls need an entirely different toolkit.
Matching Wall Anchor Weight Limits to Your Project
Manufacturers print weight ratings for a reason, and treating those numbers as suggestions rather than rules is how walls get damaged. Here is a general framework for matching hardware to wall anchor weight limits based on common household items.
Light Loads (Under 10 Pounds)
Small picture frames, clocks, and single floating hooks fall into this category. A basic plastic ribbed anchor or even a drywall picture hook is usually sufficient here.
Medium Loads (10 to 25 Pounds)
Small shelves, wall clocks with glass fronts, and lightweight mirrors need self-drilling threaded anchors rated for at least double the item’s actual weight.
Heavy Loads (25 to 75 Pounds)
Large mirrors, bookshelves, and televisions require toggle bolts or metal sleeve anchors, ideally anchored into a stud whenever the bracket design allows it.
Extreme Loads (75+ Pounds)
Anything in this range, such as a wall-mounted cabinet full of dishes, should be secured directly into framing with lag bolts rather than relying on any drywall anchor alone. According to the Better Homes & Gardens home improvement guidelines, locating and anchoring into studs remains the gold standard for any load-bearing wall installation.
Repairing the Damage from Past Drywall Anchoring Blunders
If you are reading this after the fact, staring at a hole left behind by a failed anchor, don’t worry. Most damage caused by drywall anchoring blunders is fixable in an afternoon with basic supplies.
Small Holes Under One Inch
Lightweight spackle applied with a putty knife, left to dry, lightly sanded, and painted over will erase the evidence almost completely.
Medium Holes From Torn Anchors
A self-adhesive mesh patch bridges the gap, giving joint compound something to grip rather than sinking into open air. Apply two thin coats, sanding lightly between each, for a seamless finish.
Large Craters from Failed Heavy Items
When a chunk of drywall has broken away entirely, you will need to cut a clean rectangular patch, insert a backing scrap behind the hole, and screw a new piece of drywall into place before taping and mudding the seams.
Just as consistent, gentle care prevents problems indoors with your houseplants, the same philosophy of patience applies to wall repair. In fact, the same careful, root-level approach described in our guide to bottom watering techniques for healthier houseplants mirrors the mindset needed here: work from a stable foundation outward, rather than rushing the surface.
Pro Tips to Prevent Future Drywall Anchoring Blunders
Prevention is far less expensive than repair, both in time and in spackle. A handful of smart habits will keep your walls intact for years to come.
Always Test Before Final Installation
Hang the item temporarily, apply gentle downward pressure, and wait a day before considering the installation permanent. Anchors that are going to fail often show early warning signs like slight sagging or a hairline crack forming around the hole.
Label Your Anchor Drawer by Weight Class
Keep anchors sorted in small labeled containers by their rated capacity so you are never guessing under time pressure. This simple organizational habit eliminates most impulsive hardware choices.
Invest in a Quality Stud Finder
A reliable electronic stud finder costs less than a single emergency drywall repair kit and pays for itself the first time it saves a heavy item from ending up on the floor.
When in Doubt, Double Up
Using two properly spaced anchors instead of one dramatically increases stability for medium-weight items, distributing stress across a wider section of wall.
By respecting the material you are working with, matching hardware to the job, and resisting the urge to rush, you can avoid the frustrating cycle of drywall anchoring blunders for good. A little patience at the drilling stage saves hours of patching later, and your walls, mirrors, and shelves will stay exactly where you put them.