
There is a quiet magic to a wall that looks like it has witnessed centuries of sunlight, rain, and candlelight. That soft, cloudy, sun-bleached beauty is no accident of time but the result of deliberate limewash wall techniques that have been refined by plasterers and decorative painters for generations. If you have ever admired the chalky, breathable walls of a Tuscan farmhouse or a Santa Fe adobe, you have admired limewash at work. In this guide, we will walk through six refined approaches to achieve that authentic old-world texture in your own home, along with the tools, timing, and small secrets that separate an amateur finish from a genuinely heirloom-quality wall.
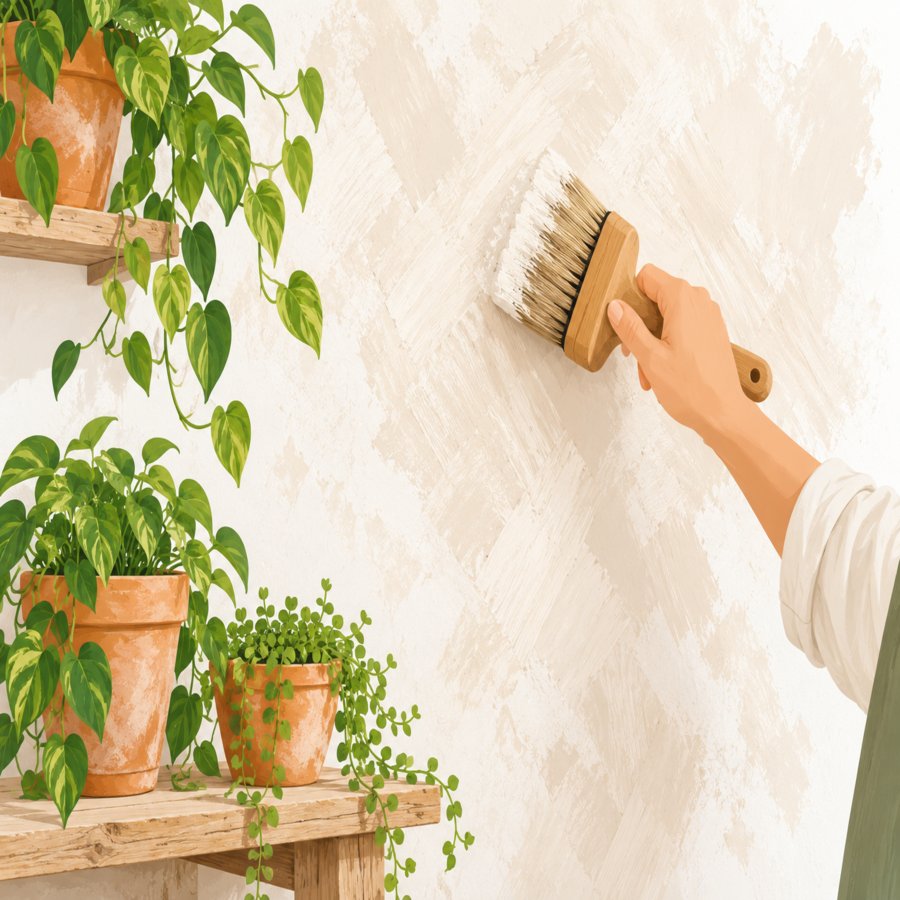
Why Limewash Wall Techniques Create Such Authentic Depth
Limewash is made from slaked lime, water, and natural pigment, and it behaves nothing like conventional latex paint. Instead of sitting on the surface, it bonds chemically with plaster, brick, and porous masonry, which is why old limewashed walls develop such rich, layered depth over time.
Because the pigment particles settle unevenly as the lime carbonates, you get that signature cloudy, mottled look that no spray gun or roller can replicate. This is the core reason designers return again and again to limewash wall techniques whenever a client wants warmth, softness, and history baked into a brand-new wall.
It also happens to be a wonderfully breathable, low-VOC option, which makes it a smart choice for bedrooms, nurseries, and anyone sensitive to the fumes of traditional paint. The porous nature of lime also helps regulate humidity, a small but meaningful bonus for homes prone to condensation.
Technique One: The Classic Crosshatch Brush Technique
The most traditional of all limewash wall techniques begins with a natural bristle brush and a disciplined X-shaped motion. You apply the diluted limewash in overlapping strokes, moving diagonally in one direction and then immediately crossing back over in the opposite diagonal while the wash is still wet.
Why it works: This crosshatch brush technique prevents the telltale roller lines and streaks that instantly reveal a modern paint job. The overlapping X-strokes scatter the pigment randomly, mimicking the way centuries of hand-applied lime coats would have built up unevenly on an old plaster wall.
Pro tip: Work in small three-foot sections so the edges stay wet enough to blend into the next section, and resist the urge to overwork any single spot more than three or four passes.
Technique Two: Layered Washes for Cloudy Dimension
A single coat of limewash will always look flat compared to a wall built up over multiple thin layers. The second of our refined limewash wall techniques relies on applying two to four translucent coats, letting each one cure for at least four hours before the next.
Each layer should be mixed slightly thinner than the one before it, so the final coat is almost watery. This gradual dilution allows light to pass through multiple translucent veils of pigment, producing that soft, cloud-like variation collectors prize in antique Mediterranean villas.
Sub-point to remember: Never rush the drying time between coats. Limewash needs exposure to carbon dioxide in the air to carbonate and harden properly, and rushing this step is the number one cause of chalky, weak finishes that rub off on clothing.
Technique Three: Sponge-Dabbing for Stone-Like Mottling
If you want your wall to resemble naturally weathered limestone rather than painted plaster, trade your brush for a large natural sea sponge. Dab the limewash on in irregular, rotating motions, varying the pressure so some spots receive more pigment than others.
This method produces a pitted, organic texture that catches light beautifully at dusk, especially in dining rooms and entryways. It pairs wonderfully with warm, earthy pigments like ochre, terracotta, and muted sage.
For gardeners who love bringing organic textures indoors, this finish often sits beautifully behind a shelf of potted greenery; if you enjoy pairing botanical elements with your decor, you might also find it useful to review how to properly care for a ficus tree indoors so your living accents thrive alongside your newly textured walls.
Technique Four: Blending Roman Clay Finish for Velvety Depth
For walls that need a bit more body and a velvety, suede-like hand-feel, many professional decorators now blend limewash with a roman clay finish. Roman clay is a thicker, trowel-applied plaster product that holds subtle ridges and valleys, and when a thin limewash glaze is brushed over it afterward, the result is extraordinary dimension.
Apply the roman clay first using a stainless-steel trowel in loose, random arcs, leaving some areas thicker and others nearly bare. Once fully cured, usually after 24 hours, follow with a limewash topcoat to soften the ridges with a hazy, atmospheric glow.
Design note: This combination works beautifully as a feature wall behind a bed headboard or fireplace, where the raking light of a lamp or window will emphasize every subtle undulation.
Technique Five: Dry-Brush Burnishing for Antique Sheen
Once your limewash has dried to the touch but hasn’t fully cured, a dry natural bristle brush can be used to burnish the surface in gentle circular motions. This buffs down the chalky top layer and reveals a faint, soft sheen underneath, similar to the polished patina found on centuries-old monastery walls.
Burnishing is best done the day after application, when the surface is firm enough to resist smearing but still soft enough to take on a slight polish. Use very light pressure, as excessive force can strip away too much pigment and expose the substrate beneath.
Many professional finishers consider this step the true signature of expert-level limewash wall techniques, since it is nearly impossible to replicate with any spray-on or powder-coated alternative.
Technique Six: Pairing with Textured Plaster Paint for Rustic Relief
Our final refined approach layers limewash over a base coat of textured plaster paint, a thicker decorative product that contains fine sand or mineral aggregate. This base creates genuine three-dimensional relief, almost like the surface of old hand-trowelled lime plaster found in centuries-old European farmhouses.
Apply the textured plaster paint first with a wide trowel or stiff brush, creating irregular peaks and valleys across the wall. Allow it to dry fully, typically 24 to 48 hours depending on humidity, before brushing on your limewash topcoat.
The limewash will pool slightly in the recessed valleys and sit thinner on the raised peaks, creating natural shadow and highlight variation without any additional glazing. It is, without question, one of the most dramatic and photogenic limewash wall techniques for accent walls, fireplace surrounds, and kitchen backsplashes.
Preparing Your Wall and Choosing the Right Pigments
No limewash technique, however refined, will succeed on a poorly prepared surface. Walls must be clean, free of oil-based paint or sealant, and ideally made of a porous material like lime plaster, brick, or mineral-based primer.
If your wall was previously painted with standard latex, you will need a mineral-bonding primer so the limewash has something porous to grip onto. Skipping this step is the single most common reason DIY limewash projects flake or peel within months.
When it comes to pigment, stick to lime-safe, alkali-resistant natural pigments rather than standard craft paint colorants, which can fade or react poorly with the lime’s high pH. Earth tones such as raw sienna, burnt umber, and soft grays tend to produce the most convincing old-world results.
For further guidance on plaster compatibility and traditional lime materials, the Royal Horticultural Society offers excellent resources on natural, breathable building materials that pair well with garden-facing walls and outdoor living spaces.
Maintaining Your Limewash Finish Through the Seasons
One of the loveliest qualities of lime-based finishes is that they age gracefully rather than looking worn out. Minor scuffs and faded patches can simply be touched up with a fresh thin coat, blended using the same crosshatch brush technique used in the original application.
Avoid harsh chemical cleaners, as the alkalinity of lime can react poorly with acidic products like vinegar-based sprays. A soft, dry microfiber cloth or a barely damp sponge is usually enough to remove dust and light grime.
In humid climates, allow extra drying time between seasons of touch-ups, since trapped moisture beneath a lime layer can eventually lead to efflorescence, a powdery white bloom on the surface. Good ventilation during application and curing will prevent most of these issues entirely.
With patience, the right tools, and a willingness to embrace a little imperfection, these six refined limewash wall techniques can transform any flat, lifeless wall into a textured, storied surface that feels as though it has always belonged in your home.