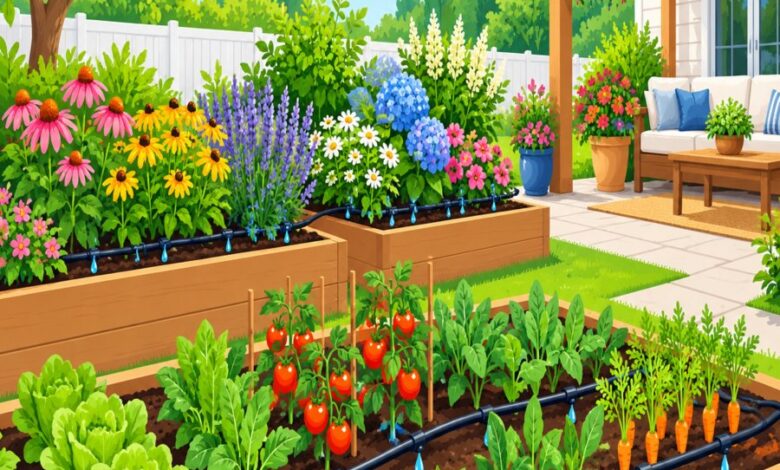
Why Smart Drip Irrigation Installation Hacks Save Water and Money
If your water bill spikes every summer while your garden still looks thirsty, you are not alone. The good news is that a handful of clever drip irrigation installation hacks can transform a wasteful sprinkler habit into a precise, low-pressure watering system that feeds roots directly instead of soaking sidewalks.
Homeowners lose shocking amounts of water to evaporation, runoff, and overspray every single season. A well-designed garden watering system built around drip lines fixes this problem at the source by delivering slow, steady moisture exactly where plants need it most.
In this guide, we will walk through practical, tested drip irrigation installation hacks that any homeowner can apply in a single weekend, no plumbing license required.

Mapping Your Yard Before You Buy a Single Fitting
The biggest mistake DIYers make is buying parts before understanding their landscape’s actual water demands. Different plants need different flow rates, and ignoring this detail wastes both water and money.
Group plants by thirst level. Succulents, Mediterranean herbs, and native perennials need far less water than vegetable beds or hydrangeas. Zone your system accordingly so one valve does not overwater drought-tolerant plants while underwatering thirsty ones.
Sketch a simple layout. Even a rough pencil drawing of beds, containers, and existing hose bibs will save you from buying the wrong tubing length twice. Note sun exposure too, since south-facing beds dry out faster and may need tighter emitter spacing.
Check your water pressure first. Most residential drip systems operate best between 15 and 30 PSI, while typical household lines run at 40 to 60 PSI. This single detail is the reason so many beginner systems leak, pop fittings, or spray wildly within days of installation.
Essential Drip Irrigation Installation Hacks for a Leak-Free System
Once your plan is on paper, these drip irrigation installation hacks will help you avoid the frustrating trial-and-error that plagues most first-time installers.
Always install drip line pressure regulators first. Screwing a pressure regulator directly onto your spigot or backflow preventer before anything else prevents blowouts and extends the life of every emitter downstream. Skipping this single part is the number one reason drip systems fail within their first year.
Lay tubing in full sun before cutting. Warm, flexible poly tubing is far easier to curve around beds and bend into fittings than cold, stiff tubing fresh from a garage shelf. Let a coil sit in the sun for twenty minutes before you start connecting pieces.
Use a hole punch tool, never a screwdriver. A dedicated punch creates a clean, round opening that seals tightly around emitters. Improvised tools leave jagged holes that weep water and eventually crack the tubing wall.
Flush the line before capping it. Run water through your entire tubing run before installing end caps or emitters. This clears out manufacturing debris and dirt that would otherwise clog tiny emitter openings almost immediately.
Stake tubing every three to four feet. Unanchored lines shift when pets, kids, or wind move them, which gradually pulls emitters away from root zones. Inexpensive U-shaped stakes solve this permanently.
Getting Emitter Tube Spacing Right for Every Plant Type
Correct emitter tube spacing is where most home gardeners either overwater or underwater their plants without realizing it. Spacing depends heavily on soil type and root spread, not just plant size.
Sandy soil needs tighter spacing. Water moves straight down through sand with little horizontal spread, so emitters placed 12 inches apart are often necessary to keep root zones evenly moist.
Clay soil allows wider spacing. Because clay disperses water horizontally, emitters set 18 to 24 inches apart typically provide full coverage without pooling or runoff.
Trees and shrubs need multiple emitters, not one. A single emitter at the trunk base barely reaches the feeder roots. Instead, circle the drip line around the plant’s canopy edge, placing two or three emitters evenly spaced to mimic natural rainfall patterns.
Vegetable rows benefit from inline emitter tubing. Rather than punching individual emitters, pre-manufactured tubing with built-in emitters every six or twelve inches delivers wonderfully even moisture along raised beds and row crops.
Upgrading Your Garden Watering System With Smart Controls
A hand-tightened timer at the spigot is a fine starting point, but pairing your garden watering system with smart technology multiplies your water savings significantly.
Install a Wi-Fi irrigation controller. These devices adjust watering schedules automatically based on local weather data, skipping cycles after rainfall and extending them during heat waves without you lifting a finger.
Add a soil moisture sensor. Placed near your most valuable plants, these inexpensive probes prevent watering when the ground is already saturated, which is one of the simplest ways to stop root rot before it starts.
Separate zones by sun exposure. Running shaded beds on a different valve than full-sun borders lets you fine-tune run times instead of settling for a one-size-fits-all schedule that inevitably wastes water somewhere in the yard.
According to the Royal Horticultural Society , targeted watering at the root zone rather than overhead spraying is one of the most effective ways to conserve water while improving plant health, which is exactly what a properly tuned drip system accomplishes.
Troubleshooting Common Drip Line Pressure Regulators Problems
Even with careful planning, pressure issues are the most frequent headache in drip systems. Here is how to diagnose and fix the usual suspects quickly.
Weak flow at the far end of the line. This usually means your main line is too long for the pressure feeding it, or your drip line pressure regulators are rated too low for your system size. Switching to a higher-flow regulator rated 25 PSI instead of 15 PSI often solves this instantly.
Emitters popping off the tubing. This is a telltale sign of excess pressure, meaning your regulator either failed or was skipped entirely during installation. Always verify the regulator is seated correctly and rated for your specific flow volume.
Puddling near the valve box. Check for a cracked fitting right after the regulator, since this is the highest-pressure point in the entire system and the most common failure location.
Inconsistent output across zones. If one zone runs strong and another trickles, you likely have mismatched regulators across valves. Standardizing every zone to the same PSI rating keeps your entire garden watering system balanced and predictable.
Seasonal Maintenance Hacks That Extend System Life
A drip system is not a set-it-and-forget-it project. A few minutes of seasonal maintenance each quarter prevents expensive mid-summer failures.
Flush lines at the start of each season. Remove end caps and run water through the system for sixty seconds to clear sediment, insect debris, and mineral buildup that accumulates over winter dormancy.
Inspect emitters for clogging monthly. Hard water deposits and algae growth are the leading causes of reduced flow. A quick visual check during your regular watering routine catches problems before plants show stress.
Winterize in freezing climates. Disconnect and drain tubing before the first hard frost, since trapped water expanding inside the lines is one of the fastest ways to crack fittings and ruin an entire season’s installation.
Replace filters annually. The small inline filter near your regulator is cheap and easy to overlook, yet a clogged filter chokes flow to every emitter downstream of it.
The Old Farmer’s Almanac notes that consistent, deep watering schedules encourage stronger root systems than frequent shallow watering, reinforcing why a well-maintained drip setup outperforms casual hose watering over time.
Budget-Friendly Drip Irrigation Installation Hacks for Renters and Small Yards
You do not need a sprawling backyard or a big budget to benefit from these drip irrigation installation hacks . Container gardens, patios, and rental properties can all use scaled-down versions of the same principles.
Use a simple kit for container gardens. Pre-packaged drip kits with a battery timer, short tubing runs, and stake-mounted emitters can water a dozen potted plants for under the cost of a single lawn service visit.
Choose quick-connect fittings over glued PVC. Renters especially benefit from push-fit connectors that allow the entire system to be disassembled and taken along when moving, with zero damage to existing hardscaping.
Repurpose old garden hoses as mainlines. A hose with a punctured section is often still usable as a feeder line for drip tubing branches, saving you the cost of new half-inch poly pipe for short runs.
If you are tackling several DIY upgrades around the house at once, it is worth reviewing common pitfalls elsewhere too, much like this breakdown of common epoxy countertop installation mistakes to avoid, since careful prep work saves money across nearly every home improvement project, not just irrigation.
Final Thoughts on Cutting Water Waste for Good
Cutting costly water waste does not require ripping out your landscaping or hiring an expensive contractor. With the right drip irrigation installation hacks , most homeowners can build an efficient, low-maintenance system over a single weekend.
Remember the fundamentals: map your yard before buying parts, install drip line pressure regulators from the very start, respect proper emitter tube spacing for your soil type, and maintain your garden watering system seasonally rather than ignoring it until something breaks.
Do these steps right once, and you will spend far less time fiddling with hoses and far more time enjoying a garden that practically takes care of itself.