
There is something quietly magical about transforming your home for the holidays using nothing more than citrus, twine, and a little patience. If you have ever admired a garland draped across a mantel and wondered how it achieved that rustic, sun-kissed glow, you are about to discover the real diy holiday garland secrets behind it. This guide unpacks eight enchanting techniques for crafting garlands featuring sun-dried citrus slices, giving your living room, staircase, or front porch a warm, aromatic, farmhouse-inspired finish this season.
Unlike store-bought decorations that often look mass-produced and feel disposable, a handmade citrus garland carries texture, scent, and personality. It is budget-friendly, endlessly customizable, and surprisingly simple once you understand the drying, stringing, and styling fundamentals. Let’s dig into the techniques that make these garlands truly unforgettable.
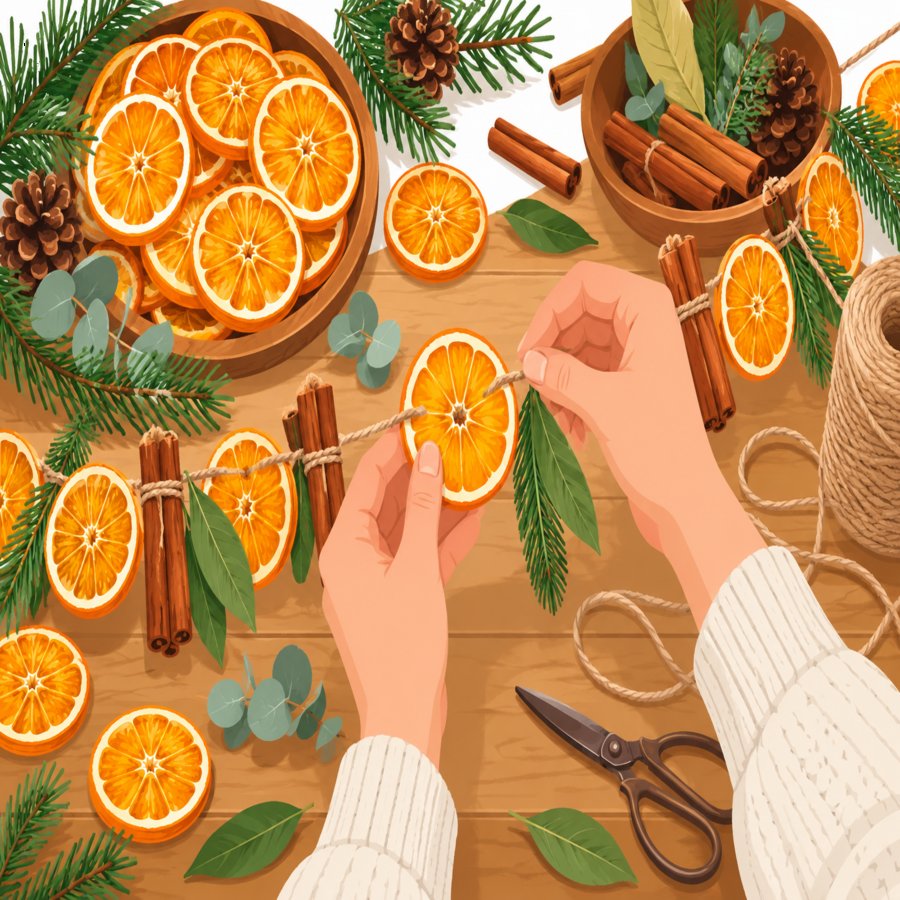
Secret One: Mastering Dehydrated Orange Slices from Scratch
Every great citrus garland begins with properly prepared fruit, and this is where most of the diy holiday garland secrets actually live. The goal is to remove moisture slowly so the slices retain color and structural integrity instead of turning brown or moldy.
Start by slicing oranges, lemons, or limes into even rounds about a quarter-inch thick. Thinner slices dry faster but can become brittle, while thicker slices hold their shape beautifully for a chunkier, rustic look.
Oven Method: Arrange slices on a wire rack over a baking sheet and dry at the lowest oven setting, usually around 200°F, for two to three hours, flipping halfway through.
Dehydrator Method: If you own a food dehydrator, this is the most reliable way to produce consistent dehydrated orange slices with vibrant color and minimal shrinkage. Set it to 135°F and allow six to eight hours for full drying.
Blot each slice with a paper towel before drying to remove excess juice, which speeds up the process and prevents overly sticky results.
Secret Two: Choosing the Right Citrus and Companion Materials
Not all citrus fruits dry with the same visual impact. Oranges produce a warm amber tone, while lemons dry into a soft golden yellow and limes offer a muted sage green that pairs wonderfully with evergreen foliage.
For a layered, textured garland, mix your dried citrus with natural elements such as cinnamon sticks, dried bay leaves, pinecones, cranberries, and sprigs of fresh or faux eucalyptus. These additions create depth and make the garland feel intentionally curated rather than simplistic.
According to the Old Farmer’s Almanac, incorporating seasonal botanicals like rosemary and juniper berries into holiday displays not only enhances fragrance but also extends the natural shelf life of dried arrangements when kept away from humidity.
When selecting companion materials, favor items that dry well themselves so your entire garland ages gracefully together rather than having fresh greenery wilt while the citrus remains perfectly preserved.
Secret Three: Stringing Techniques That Prevent Breakage
One of the most frustrating mistakes beginners make is threading dried citrus incorrectly, causing slices to crack or slip. Use a large-eye needle and sturdy cotton twine or jute cord rather than thin thread, which can saw through the dried fruit under tension.
Pierce each slice near the rind edge rather than through the center flesh, since the peel is more durable and less likely to split. Space your citrus slices with small knots on either side to keep them from sliding together and overlapping awkwardly.
Pro Tip: Alternate citrus slices with small clusters of greenery or cinnamon bundles tied with thin wire. This creates rhythm along the garland and reduces strain on any single fragile piece of fruit.
If a slice does crack while threading, don’t discard it. Broken pieces can be tucked into gaps along the garland or used in a decorative bowl for added texture elsewhere in the room.
Secret Four: Building the Perfect Rustic Mantel Garland
A rustic mantel garland is the centerpiece most homeowners dream about during the holiday season, and achieving that effortless, farmhouse charm requires thoughtful layering rather than random placement.
Begin with a base layer of fresh or faux evergreen garland draped along the mantel’s length, allowing it to drip slightly over the edges for a relaxed, organic silhouette. Then weave your citrus-and-twine strand on top, letting slices face outward so their color pops against the dark green backdrop.
Add varying textures such as burlap ribbon, small ornaments, or dried hydrangea blooms tucked between the greenery to break up visual monotony. The key to a convincing rustic look is imperfection, so resist the urge to make every section symmetrical.
If your mantel sits beneath a wood or faux wood beam, you can echo that natural material throughout your display. For homeowners who love the look of exposed wood accents, these clever faux beam ceiling techniques pair beautifully with citrus garland styling to create a cohesive, cabin-inspired holiday atmosphere throughout the entire room.
Secret Five: Exploring Festive Dried Fruit Crafts Beyond the Garland
Once you have mastered the drying process, you will likely have extra slices on hand, which opens the door to a variety of festive dried fruit crafts that complement your main garland beautifully.
Use leftover slices to create individual ornaments by threading ribbon through a small punched hole and hanging them directly on the Christmas tree. Their translucent, stained-glass quality looks stunning when lit from behind by string lights.
You can also arrange dried citrus into wreaths, use them as rustic gift-wrap toppers tied with twine, or float whole slices in simmering potpourri pots on the stovetop for a natural home fragrance that fills the entire house.
These small projects stretch your citrus investment further and ensure nothing goes to waste after your main garland project is complete.
Secret Six: Preserving Color and Preventing Mold Long-Term
Longevity is where many citrus garlands fail, often turning moldy or fading within days if moisture was not fully removed during drying. This is one of the most important diy holiday garland secrets for ensuring your hard work lasts the entire holiday season.
Before stringing, bend each slice slightly to test for flexibility. Properly dried citrus should feel firm and leathery, not soft or tacky, which indicates residual moisture that will eventually cause spoilage.
Store any extra dried slices in an airtight container with a packet of silica gel or a few grains of uncooked rice to absorb ambient humidity. Keep your finished garland away from direct sunlight, steamy kitchens, or bathrooms where moisture in the air can reintroduce dampness.
A light spritz of clear sealant spray can also add a protective barrier, helping the citrus resist moisture absorption while maintaining its natural matte finish.
Secret Seven: Styling Citrus Garlands Throughout the Home
While the mantel is the most popular placement, there are countless other spots in your home where a citrus garland can shine. Staircase railings instantly feel more festive when wrapped with a citrus-and-greenery strand secured with wire at intervals.
Doorframes, window frames, and even kitchen cabinet edges benefit from a shorter garland segment, bringing holiday warmth into rooms that often get overlooked during decorating. Consider draping one across a dining table runner as a centerpiece alternative.
For outdoor charm, hang a weatherproofed version on your front porch railing or around an outdoor wreath hook, though be mindful that humidity and rain will shorten its lifespan compared to indoor display.
The Better Homes & Gardens editorial team has long championed citrus-based holiday decor as a cost-effective way to achieve designer-level styling using ingredients most households already have on hand.
Secret Eight: Troubleshooting Common Diy Holiday Garland Secrets Mistakes
Even seasoned crafters run into hiccups, so understanding the most common pitfalls rounds out our list of essential diy holiday garland secrets for a flawless finished product.
Uneven Drying: This usually means slices were cut at inconsistent thicknesses. Use a sharp knife or mandoline slicer to keep every round uniform for even dehydration.
Faded Color: Drying at too high a temperature can scorch the citrus and dull its natural hue. Lower the heat and extend the drying time for richer, more vibrant tones.
Garland Sagging: Overloading twine with too many heavy elements causes drooping. Reinforce longer garlands with a thin wire core hidden inside the twine for added support.
Taking time to troubleshoot these small details separates an amateur project from a genuinely show-stopping holiday display that your guests will ask about all season long.
Final Thoughts on Crafting Your Citrus Garland Masterpiece
Mastering these eight techniques transforms a simple bowl of citrus into a stunning, fragrant holiday centerpiece that feels personal and handcrafted. From proper drying methods to clever styling placement, these diy holiday garland secrets give you everything needed to create a garland worthy of any design magazine.
Gather your citrus, string, and favorite seasonal accents, and give yourself permission to experiment. The imperfections are what make a handmade garland so charming, and every slice tells its own small story of warmth and tradition.