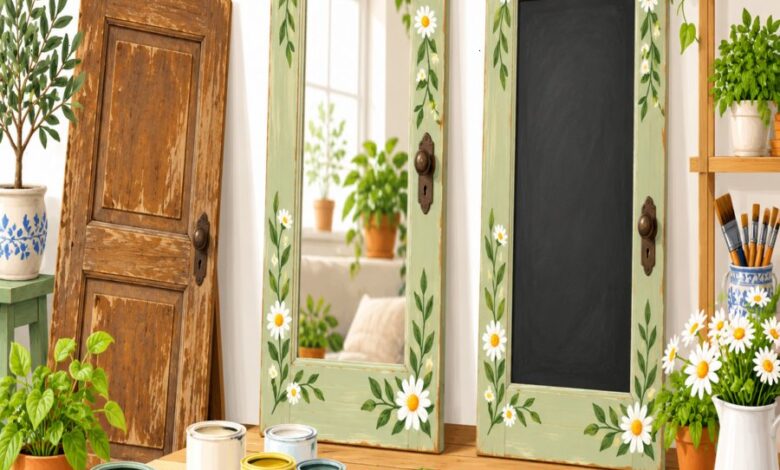
Before you haul those old kitchen doors off to the landfill, stop and take a closer look. Those worn, paint-chipped panels are hiding serious decorative potential, and upcycled cabinet door projects have become one of the most rewarding ways to breathe new life into tired wood without spending a fortune. Whether you just finished a kitchen renovation or found a stack of orphaned doors at a salvage yard, these six ideas will transform that discarded lumber into stunning, functional decor for every room in your home.
Why Upcycled Cabinet Door Projects Deserve a Spot in Your Workshop
There is something deeply satisfying about rescuing a material that was headed for the dumpster. Sustainability meets style when you choose reclaimed wood over new lumber, and cabinet doors offer a uniquely versatile starting point.
They already come with a frame, often raised-panel detailing, and sometimes decorative molding that would cost extra to replicate from scratch. This built-in character is exactly why so many DIY enthusiasts gravitate toward repurposed cupboard doors instead of plain plywood.
Beyond the aesthetic appeal, these projects are budget-friendly and approachable for beginners. You do not need a fully stocked woodshop to succeed; a few hand tools, some paint, and a weekend afternoon are often enough to complete a stunning transformation.
Project One: The Vintage Wooden Tray DIY Centerpiece
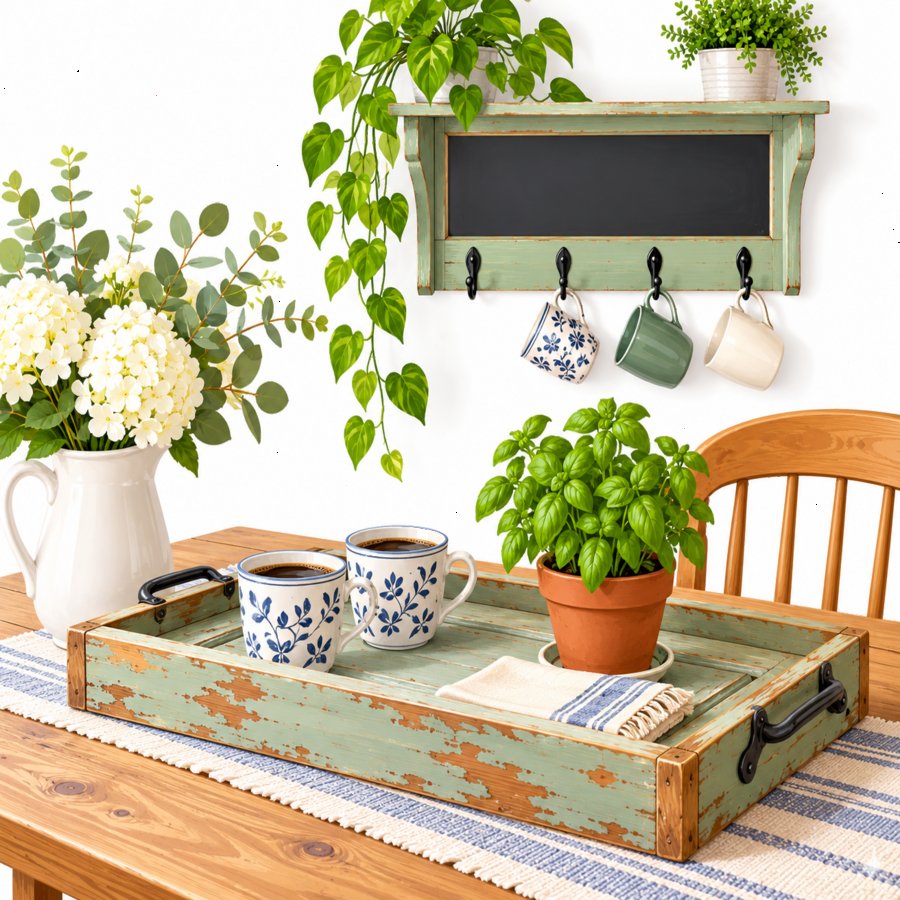
Flat-panel or slightly recessed cabinet doors make an outstanding base for a farmhouse-style serving tray. This vintage wooden tray diy build is one of the simplest ways to dip your toes into upcycled cabinet door projects.
Start by sanding the door smooth, then attach decorative drawer-pull handles to either end for easy carrying. Add a lip around the edges using thin trim strips if the door is perfectly flat, so crumbs and spills stay contained.
Finish with a food-safe sealant or a coat of chalk paint distressed at the corners for that lived-in, farmhouse charm. Use it to serve coffee, display candles on your dining table, or organize bathroom essentials on the vanity counter.
Project Two: A Rustic Chalkboard Wall Hanger for Daily Organization
If your cabinet door has a recessed center panel, you have the perfect candidate for a chalkboard wall hanger. This is one of the most functional upcycled cabinet door projects for busy households that need a central message hub.
Paint the recessed panel with chalkboard paint, allowing two to three coats for full coverage, and leave the surrounding frame in its natural wood tone or a contrasting color. Add small hooks along the bottom edge to hold keys, mail, or dog leashes.
Mount it near the entryway so family members can jot down reminders, grocery lists, or weekly chores. It is a practical piece that instantly elevates a mudroom or kitchen command center, and it pairs beautifully with other clever entryway styling ideas for a welcoming home when you are preparing your space for guests or buyers.
Project Three: Framed Mirror Makeover Using Repurposed Cupboard Doors
Raised-panel cabinet doors often have a routed center groove that is ideal for inserting a mirror. Simply remove the center panel with a router or jigsaw, measure the opening, and have a glass shop cut a mirror to fit.
Secure the mirror from the back using mirror clips or a thin plywood backing panel. Paint or stain the frame to match your bathroom or bedroom decor, and attach a sawtooth hanger for easy wall mounting.
This project proves that repurposed cupboard doors can rival store-bought framed mirrors in both quality and personality, often at a fraction of the price. Group three or four together in varying sizes for a gallery-style accent wall.
Project Four: Decorative Shutters and Window-Style Wall Art
Louvered cabinet doors, the kind with angled wooden slats, make exceptional faux shutters for exterior walls or interior accent pieces. Mount a pair flanking a window for an instant architectural upgrade.
For an indoor option, hinge two louvered doors together and stand them as a decorative room divider or privacy screen in a home office. Weatherproof paint is essential if the piece will live outdoors, since moisture and UV exposure can warp untreated wood quickly.
According to the Royal Horticultural Society, incorporating reclaimed wooden elements into garden design not only reduces waste but also adds textural warmth that complements lush plantings, making this a natural extension of your outdoor living space.
Project Five: A Statement Headboard Built from Cabinet Doors
For a show-stopping bedroom focal point, line up several cabinet doors side by side and secure them to a plywood backing board. This is one of the more ambitious upcycled cabinet door projects, but the payoff is a one-of-a-kind headboard with real architectural presence.
Mix doors of slightly different heights for a reclaimed, eclectic look, or keep them uniform for a cleaner, more cohesive design. Stagger the stain colors between warm walnut and whitewash for added depth and visual interest.
Attach the finished panel directly to the wall studs or to your existing bed frame using heavy-duty L-brackets. It is a conversation-starting centerpiece that costs a fraction of a designer headboard.
Project Six: Garden Planter Boxes from Reclaimed Doors
Take your upcycled cabinet door projects outdoors by building a raised planter box for your patio or vegetable garden. Four matching cabinet doors can form the sides of a sturdy square planter when joined at the corners with exterior-grade screws.
Line the interior with heavy plastic sheeting before adding soil to protect the wood from constant moisture exposure. Drill drainage holes in the base to prevent root rot and waterlogging during heavy rain.
The paneled detailing on most cabinet doors gives these planters a cottage-garden charm that plain cedar boxes simply cannot match. Fill them with herbs, trailing petunias, or a mix of seasonal annuals for color all year long.
Prep Work That Makes Every Upcycle Project Succeed
No matter which of these six builds you tackle first, proper preparation determines whether your finished piece looks polished or amateurish. Always start by removing old hardware, hinges, and screws completely.
Inspect for structural damage such as water rot, cracked joints, or warping before investing time in paint and finishing. A door with significant moisture damage is rarely worth saving for furniture use.
Sand every surface with 120-grit paper first, followed by 220-grit for a smooth finish, and always wipe down with a tack cloth to remove dust before painting. If the door has an old layer of paint that predates 1978, test for lead content before sanding, as this creates hazardous dust.
Primer is non-negotiable when working with reclaimed wood, since it blocks old stains and tannins from bleeding through your fresh paint color. Skipping this step is the most common reason DIY furniture projects look unfinished.
Sourcing Doors and Choosing the Right Finish
You do not need to renovate your own kitchen to get started. Habitat for Humanity ReStore locations, estate sales, and online marketplace listings are reliable sources for free or low-cost repurposed cupboard doors.
Solid wood versus MDF matters significantly here. Solid wood doors sand, stain, and age beautifully, while medium-density fiberboard doors are prone to swelling if exposed to moisture, making them better suited for indoor, low-humidity projects like the chalkboard wall hanger.
When selecting a finish, chalk paint offers the fastest route to a shabby-chic look with minimal prep, while traditional stain highlights the natural wood grain for a more refined result. Water-based polyurethane remains the top choice for sealing pieces like the vintage wooden tray diy project that will encounter spills and daily handling.
For outdoor builds like the planter box or shutters, always choose exterior-rated sealants rated for UV and moisture resistance. The Old Farmer’s Almanac recommends resealing outdoor wood structures annually to extend their lifespan through harsh seasonal weather changes.
Styling Your Finished Pieces Throughout the Home
Once your builds are complete, thoughtful placement makes all the difference in how they read within a room. A single framed mirror or chalkboard wall hanger can serve as the anchor piece that a whole wall arrangement builds around.
Repeat materials intentionally by pairing your cabinet door tray with matching wood tones elsewhere in the kitchen, like open shelving or a butcher block island. Cohesion across a space, rather than one standout piece, is what elevates a home’s overall design.
These upcycled cabinet door projects also photograph wonderfully for listing photos if you are preparing to sell, since buyers consistently respond well to warm, characterful, and sustainably-minded decor touches throughout a property.
Ultimately, the beauty of working with reclaimed cabinet doors lies in the flexibility they offer. Every door carries its own grain pattern, wear marks, and history, which means no two finished projects will ever look quite the same, and that individuality is exactly the point.