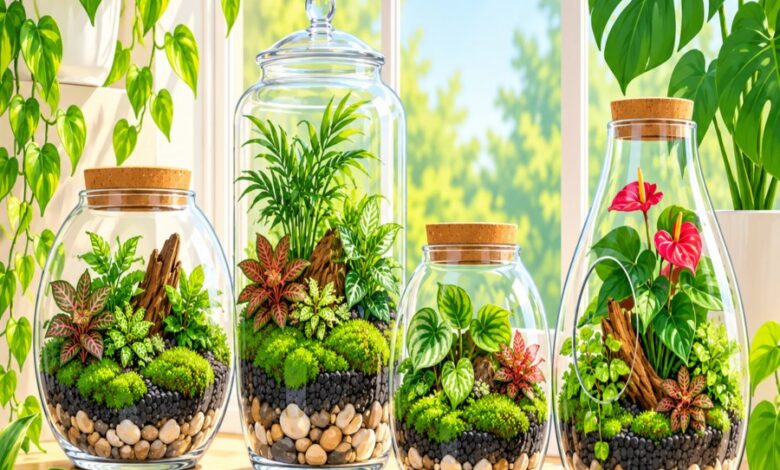
If you have ever peered into a thriving glass garden and wondered how it stays lush without weekly watering, the answer lies in mastering terrarium layering secrets. These foundational techniques transform an ordinary glass vessel into a miniature, self-sustaining ecosystem that can thrive for months or even years. Understanding the science behind drainage, moisture control, and plant placement is what separates a soggy, moldy failure from a flourishing indoor jungle. In this guide, we will walk through every element of building a closed terrarium that essentially takes care of itself.
Why Terrarium Layering Secrets Matter for Long-Term Success
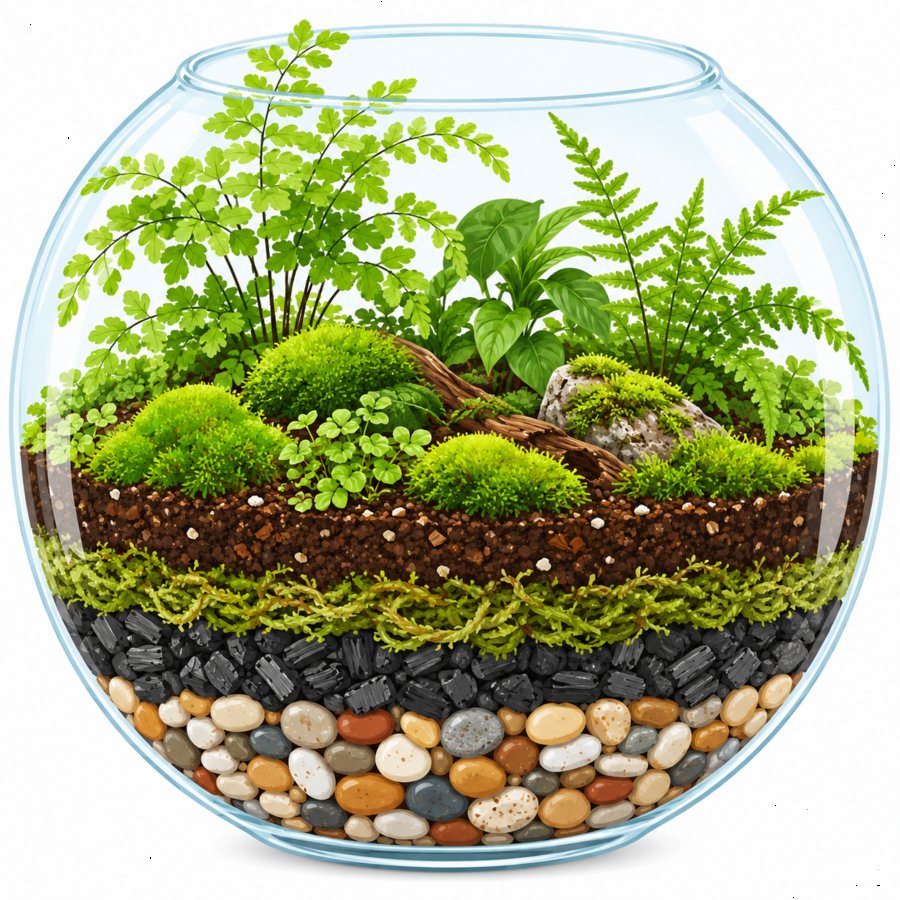
A terrarium is essentially a closed-loop water cycle trapped inside glass. Without the right foundation, excess moisture pools at the bottom, roots rot, and fungus gnats move in uninvited. The core of all terrarium layering secrets is building a structure that mimics nature’s own filtration system—gravel for drainage, charcoal for purification, and substrate for nourishment.
When each layer performs its specific job, water is recycled through evaporation and condensation rather than stagnating. This is the difference between a terrarium you tend once a month and one you fuss over daily. Getting the order and proportions right from the very first layer sets the stage for decades of low-maintenance beauty.
Choosing the Right Glass Vessel and Understanding the Closed Terrarium False Bottom
Before you add a single pebble, consider the shape of your container. Wide-mouth jars, apothecary globes, and fish tanks all work beautifully, but closed vessels with lids are essential for true self-sufficiency. A sealed environment traps humidity and allows the water cycle to repeat indefinitely without outside intervention.
Building the False Bottom
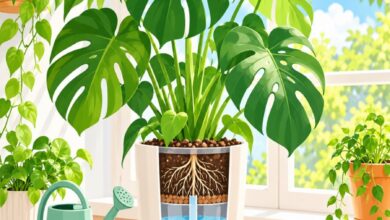
The term closed terrarium false bottom refers to the reservoir space created beneath the soil line where excess water collects away from plant roots. This is typically built using a one to two inch layer of expanded clay pebbles, aquarium gravel, or lava rock at the very base of the container. The goal is to create a physical buffer zone so roots never sit directly in standing water.
Without this reservoir, even the most carefully chosen plants will eventually succumb to root rot. The false bottom is arguably the single most important of all the terrarium layering secrets, because it dictates whether moisture management succeeds or fails long-term.
The Critical Role of Activated Charcoal Moisture Filtration
Directly above the drainage layer sits a thin stratum of activated charcoal, and this layer does far more work than most beginners realize. Activated charcoal moisture absorption prevents the buildup of toxins, filters out impurities released by decaying organic matter, and keeps the entire ecosystem smelling fresh rather than musty.
Charcoal also inhibits the growth of harmful bacteria and mold spores that thrive in humid, enclosed spaces. A quarter-inch layer is usually sufficient for small to medium containers, while larger terrariums may need closer to half an inch spread evenly across the gravel. Skipping this layer is one of the most common mistakes that leads to cloudy glass and foul odors within just a few weeks.
Horticultural-grade activated charcoal, available at most garden centers or pet supply stores, is specifically processed to maximize surface area for filtration. Avoid using charcoal briquettes meant for grilling, as these often contain chemical additives that can harm delicate root systems.
Selecting the Best Terrarium Moss Substrate for Nutrient Balance
Once drainage and filtration are in place, it is time to introduce a buffering layer before the actual soil. A thin sheet of sphagnum moss works wonderfully here, acting as a natural barrier that prevents fine potting soil from migrating down into the gravel and clogging your drainage system.
Choosing the right terrarium moss substrate also contributes beneficial organic matter and helps regulate humidity within the growing medium itself. Sheet moss, New Zealand sphagnum, or even dried green moss can all serve this purpose depending on the aesthetic you are going for.
Layering the Soil
Above the moss, add two to three inches of a well-draining potting mix formulated specifically for terrariums or tropical houseplants. Standard garden soil is too dense and will compact over time, suffocating roots and trapping excess water. A blend of peat, perlite, and orchid bark typically offers the ideal balance of aeration and moisture retention for most closed terrarium setups.
Advanced Terrarium Layering Secrets for Plant Placement and Design
With your foundational layers complete, the fun part begins: designing the living landscape. Choose slow-growing, humidity-loving plants such as nerve plants, baby’s tears, miniature ferns, or polka dot plants that will not quickly outgrow their glass home.
Taller specimens should be positioned toward the back or center depending on your viewing angle, while trailing plants work best near the edges where they can cascade naturally. Grouping plants with similar light and moisture needs is one of the lesser-known terrarium layering secrets that dramatically improves longevity and reduces the risk of one species overwhelming another.
Decorative elements like small driftwood pieces, smooth river stones, or miniature figurines can be nestled into the design after planting, adding visual depth without disrupting the underlying ecosystem. If you enjoy repurposing household materials for creative projects, you might also appreciate browsing these clever upcycled cabinet door projects for more sustainable home styling inspiration that pairs beautifully with a botanical display.
Watering, Sealing, and Establishing the Self-Sustaining Water Cycle
After planting, mist the soil lightly and lightly water until it is evenly moist but not saturated. Seal the lid and place your terrarium in bright, indirect light—never direct sunlight, which can cook plants inside sealed glass.
Within 24 hours, you should notice light condensation forming on the inner walls each morning that clears by afternoon. This is the hallmark of a properly balanced closed ecosystem: water evaporates from the soil, condenses on the glass, and trickles back down to the roots in a continuous, self-watering loop.
If condensation is excessive and persistent all day, remove the lid for a few hours to release moisture. If no condensation ever appears, add a small amount of water. According to the Royal Horticultural Society, maintaining this delicate humidity balance is essential for preventing both fungal disease and plant desiccation in enclosed growing environments.
Troubleshooting Common Terrarium Problems
Even with perfect layering, occasional issues can arise, and knowing how to respond quickly keeps your glass garden healthy.
Mold or White Fuzz
A small amount of white mold on soil or decaying plant matter is often harmless and part of the natural decomposition process. Remove visible patches with a cotton swab and increase airflow by cracking the lid for a day.
Yellowing Leaves
This usually signals overwatering or insufficient drainage. Revisit your false bottom depth and ensure the charcoal layer has not become compacted or waterlogged over time.
Leggy or Stretching Growth
This indicates insufficient light. Relocate your terrarium closer to a bright window or supplement with a small grow light positioned a foot or two above the glass.
Long-Term Maintenance Using Proven Terrarium Layering Secrets
A well-built closed terrarium can go weeks or even months without any watering at all, but it still benefits from occasional attention. Trim back overgrown foliage every few months to prevent overcrowding, and remove any yellowed or decaying leaves promptly to avoid fungal buildup.
Rotate the container occasionally so all sides receive even light exposure, which encourages balanced, symmetrical growth. Every six to twelve months, consider refreshing the top layer of soil with a light sprinkle of fresh potting mix to replenish depleted nutrients.
Applying these ongoing terrarium layering secrets ensures your miniature landscape continues thriving for years rather than months. Many terrarium enthusiasts report thriving displays lasting well beyond a decade with minimal intervention once the initial layers are correctly established.
With patience and attention to these foundational principles, your glass garden will become a living testament to the beauty of balanced, self-sustaining ecosystems right on your windowsill.