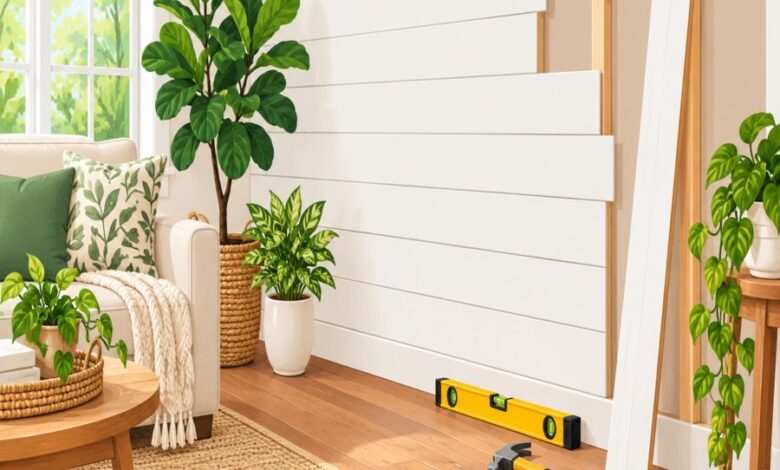
The Most Common DIY Shiplap Mistakes Homeowners Make
Shiplap has earned its spot as one of the most beloved wall treatments in modern homes, and it’s easy to see why. But behind every stunning accent wall photo online, there are dozens of diy shiplap mistakes quietly happening in garages and living rooms across the country.
From buckled boards to gapping seams, these errors aren’t just cosmetic annoyances. They can lead to structural headaches, costly repairs, and a project that looks worse six months later than it did on install day.
In this guide, we’re breaking down exactly why shiplap walls fail, how to avoid the pitfalls, and what separates a professional-looking installation from a Pinterest fail. Whether you’re planning your first accent wall or fixing a previous attempt, this is the resource you need before you pick up a nail gun.
Let’s start with the big picture. Most diy shiplap mistakes trace back to a handful of root causes: poor material prep, rushed planning, ignoring the wall’s condition, and skipping acclimation time for the wood.
Each of these issues seems small in isolation. Together, they compound into a wall that buckles, gaps, or separates from the studs within a year of installation.
The good news is that every single one of these problems is preventable. You just need to understand what’s happening behind the scenes with your wood, your walls, and your tools.
Why Wood Wall Warping Ruins Otherwise Beautiful Accent Walls
If there’s one issue that haunts shiplap projects more than any other, it’s wood wall warping. This happens when boards absorb or lose moisture unevenly, causing them to bow, cup, or twist after they’ve already been nailed in place.
Warping is rarely immediate. It often shows up weeks or months after installation, which is exactly why so many homeowners don’t connect the dots back to their original prep work.
The acclimation step nobody wants to wait for. Wood is hygroscopic, meaning it constantly absorbs and releases moisture based on the humidity of the room. If you bring boards straight from a lumber yard or big box store into your house and nail them up the same afternoon, you’re setting yourself up for trouble.
Boards need at least 48 to 72 hours resting flat inside the room where they’ll be installed. This allows them to adjust to the ambient humidity before you commit them to the wall permanently.
Bathroom and kitchen humidity swings. Rooms with fluctuating moisture levels, like bathrooms, laundry rooms, and kitchens, are especially prone to wood wall warping. The constant cycle of steam and drying stresses the wood fibers repeatedly.
If you’re set on shiplap in a high-moisture space, consider engineered wood or MDF shiplap planks designed for humidity resistance rather than solid pine boards.
Storage conditions before installation. Leaning boards against a garage wall for weeks, especially on concrete floors, invites moisture absorption from below. Always store boards flat, elevated off the ground, and stacked with spacers between layers for airflow.
According to horticultural and building moisture research shared by the Royal Horticultural Society, understanding moisture behavior in organic materials like wood is just as relevant indoors as it is in garden structures and raised beds, since humidity affects wood fiber stability in nearly identical ways.
Accent Wall Installation Errors That Compromise the Final Look
Beyond moisture issues, a huge percentage of accent wall installation problems come down to measuring, spacing, and layout errors that are made before a single nail goes in.
Skipping the layout sketch. It’s tempting to just start nailing boards from the bottom and work your way up. But without a plan, you’ll often end up with an awkward sliver of a board at the ceiling line that looks obviously unplanned.
Measure your wall height first, divide by your board width, and adjust your starting point so the top and bottom rows are balanced and visually intentional.
Ignoring expansion gaps. Shiplap boards need breathing room. Butting them too tightly together, or nailing with zero flexibility at the ends, doesn’t account for natural seasonal expansion and contraction.
A small gap, often recommended around one-eighth of an inch, gives the wood somewhere to move without buckling the entire wall outward.
Not checking for level and plumb. Even a slight slope in your starting board gets magnified row after row. By the time you reach the ceiling, a quarter-inch error at the bottom can become a two-inch disaster at the top.
Always use a long level or laser line for your first board, and recheck every few rows as you go up the wall.
These accent wall installation details might feel tedious in the moment, but they’re exactly what separates a wall that looks custom-built from one that screams weekend project gone wrong.
Stud Nailing Tricks That Prevent Loose, Buckling Boards
Nailing technique is where a surprising number of projects quietly fall apart, sometimes literally. Boards that aren’t properly secured to studs will eventually sag, separate, or pop loose from the wall.
Here are the stud nailing tricks that professional installers rely on to keep shiplap walls secure for decades, not just for the first few months.
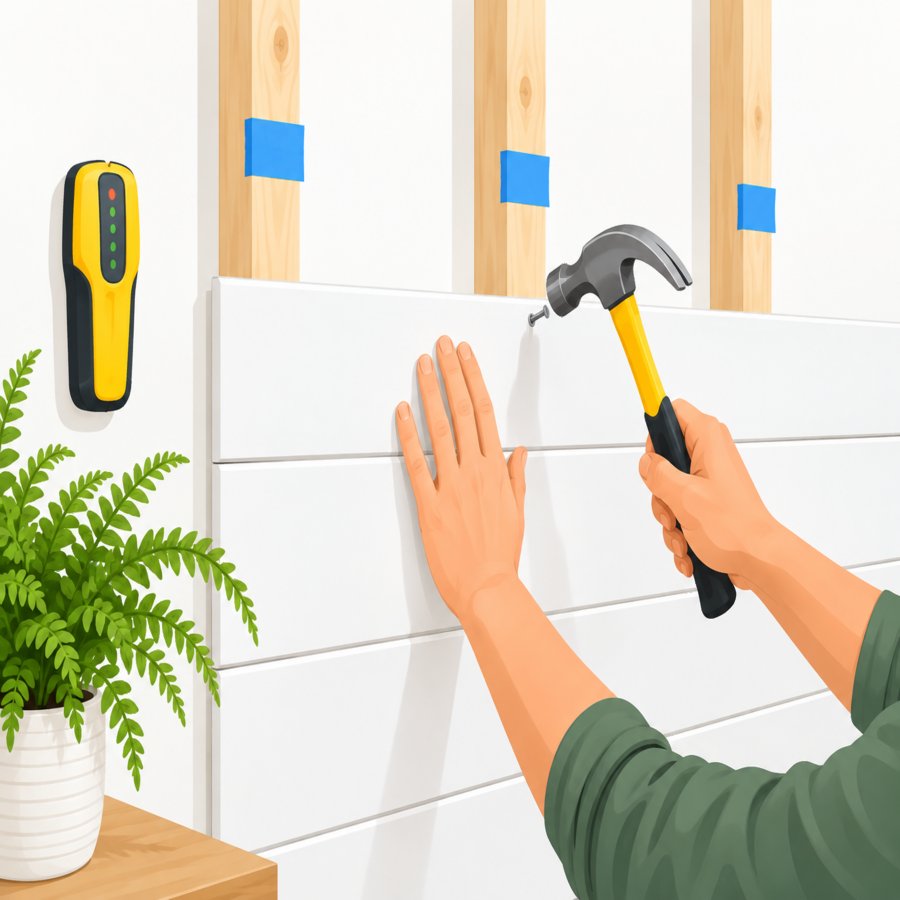
Find your studs before you find your rhythm. Use a reliable stud finder and mark every stud location with painter’s tape vertically from floor to ceiling before you start nailing. This gives you a visual guide so you’re not guessing row after row.
Angle your nails slightly. Driving nails at a slight angle, rather than perfectly straight, increases holding power significantly. This is one of the simplest stud nailing tricks and it costs nothing extra in time or materials.
Nail through the tongue, not just the face. Blind nailing through the tongue of each board hides your fasteners and distributes holding pressure more evenly along the groove-and-tongue joint, reducing the chance of future splitting.
Don’t skip studs to save time. Every board should hit every stud it crosses, not just the ones that are convenient to reach. Skipping studs is one of the sneakiest diy shiplap mistakes because it looks fine on install day and only reveals itself later.
Use the right nail length. A nail that’s too short won’t bite into the stud deeply enough, while one that’s too long can blow through the back of the stud or hit wiring. Match your nail length to your board thickness plus enough penetration depth into solid framing.
Watching a real installation side by side with your own project is one of the fastest ways to catch mistakes before they happen, especially around corners and outlets where things tend to get tricky.
Material Selection Mistakes Behind Most DIY Shiplap Mistakes
Not all shiplap is created equal, and choosing the wrong material for your space is one of the most overlooked diy shiplap mistakes homeowners make before the project even begins.
Cheap, knotty pine from the bargain bin. Lower-grade pine often contains more moisture, more knots, and more inconsistency in thickness. These imperfections become glaring problems once the boards are painted and lit from an angle.
Spend a little more on kiln-dried, straight-grain boards, and you’ll save yourself hours of sanding, filling, and frustration later.
MDF versus solid wood versus plywood planks. MDF shiplap is smooth, affordable, and resists warping well in stable climates, but it’s vulnerable to moisture damage if your room ever floods or floods slightly from a leak. Solid wood is more authentic but moves more with humidity. Plywood plank systems split the difference nicely for most living rooms and bedrooms.
Mismatched board thickness. Mixing boards from different batches or suppliers without checking thickness consistency creates a wavy, uneven surface once everything is installed and painted the same color.
Buy all your material from the same batch whenever possible, and always buy ten to fifteen percent more than your calculated square footage to account for cuts, waste, and future repairs.
The team at Better Homes & Gardens has covered similar material selection principles for interior trim projects, and the same logic applies directly to shiplap: consistency in material quality prevents most downstream headaches.
Wall Prep Shortcuts That Set Up Future Shiplap Problems
It’s easy to assume the wall behind your shiplap doesn’t matter much since it will be covered up anyway. This assumption is responsible for some of the most expensive diy shiplap mistakes homeowners encounter.
Installing over damp or damaged drywall. If there’s an existing moisture issue, mold concern, or soft drywall behind your accent wall, covering it with shiplap doesn’t solve the problem. It hides it, which is far worse.
Inspect and fully dry out your wall surface before installation. Address any leaks, condensation sources, or ventilation issues first.
Not accounting for baseboards and trim. Many homeowners nail shiplap directly over existing baseboards without planning the transition, resulting in an awkward lip or gap that’s hard to finish cleanly.
Either remove and reinstall baseboards after your shiplap goes up, or plan your bottom row to sit flush against existing trim with a proper reveal.
Forgetting about outlets and switches. Electrical boxes need to be extended out to meet the new wall surface depth. Skipping this step creates a fire hazard and a code violation, not just a cosmetic flaw.
Pick up outlet extender boxes, sold at any hardware store, before you start your installation day. It’s a small part that prevents a major headache.
Interestingly, the same attention to detail that prevents hidden wall damage applies throughout the home. Just as you’d want to catch hidden moisture behind a wall, it’s worth applying that same diligence to spaces like your bedroom, where our guide on deep cleaning techniques for a healthier mattress covers how trapped moisture and allergens build up unnoticed in everyday household surfaces too.
Finishing Touches That Make or Break Your Accent Wall Installation
Once your boards are up, you’re not quite finished. The final steps of caulking, filling, and painting are where many accent wall installation projects either come together beautifully or fall apart under close inspection.
Skipping nail hole filling. Visible nail holes catch light and shadow in a way that immediately signals “DIY” rather than “designer.” Use lightweight wood filler, let it dry fully, then sand smooth before priming.
Not caulking seams and edges. A thin bead of paintable caulk along the top, bottom, and side edges of your shiplap wall creates clean shadow lines and hides minor gaps from wall irregularities.
Avoid caulking the horizontal grooves between each board though, since that reveal line is the whole point of the shiplap look.
Using the wrong paint sheen. Flat paint shows every imperfection in bright light, while high-gloss can look plasticky on wood texture. Most designers recommend an eggshell or satin finish for the ideal balance between durability and subtle sheen.
Rushing the final coat. Applying a second coat before the first has fully cured can trap moisture in the wood, which circles right back to our earlier discussion of wood wall warping. Always follow manufacturer dry times between coats, even if it means waiting an extra day.
Seasonal timing matters too. The Old Farmer’s Almanac has long tracked how seasonal humidity swings affect indoor projects, and painting or installing wood paneling during particularly humid stretches of the year increases your risk of later warping and paint failure.
How to Fix Existing Diy Shiplap Mistakes Without Starting Over
If you’re reading this after your shiplap wall is already up and already showing problems, don’t panic. Most diy shiplap mistakes can be corrected without tearing the entire wall down.
Fixing a buckled board. Locate the stud nearest the buckle, remove the existing nail, let the board rest flat for a day if possible, then re-nail at a slight angle through the tongue. Add a second nail nearby for extra holding strength.
Closing gaps between boards. Small gaps from shrinkage can be filled with color-matched caulk or wood filler, then touched up with paint. Larger gaps may require removing and reinstalling the affected board with proper spacing this time.
Addressing a sloped or crooked row. If you notice the slope early, before painting, it’s often easier to simply remove and reinstall that single row using a level rather than trying to compensate on every row above it.
Dealing with persistent warping. If an entire section keeps warping despite repairs, there may be an underlying moisture source in the wall itself. This is worth investigating with a moisture meter before reinstalling anything, since repeated diy shiplap mistakes in the same spot often point to a hidden leak or ventilation issue.
Resources from the USDA on wood product moisture content offer useful technical background if you want to understand exactly how humidity percentages translate into visible board movement over time.
Final Thoughts on Avoiding Diy Shiplap Mistakes for Good
Shiplap remains one of the most rewarding accent wall installation projects a homeowner can tackle, but it rewards patience far more than speed.
Acclimate your boards, respect expansion gaps, master your stud nailing tricks, and never skip wall prep, and you’ll sidestep the vast majority of problems that plague rushed weekend projects.
The difference between a shiplap wall that lasts decades and one that buckles within a year almost always comes down to these small, preventable decisions made before and during installation.
Take your time, trust the process, and your accent wall will reward you with the timeless, cozy character that made you fall in love with shiplap in the first place.