Pro-Grade Luxury Vinyl Plank Hacks for Seamless Floating Floors
If you have ever stared down a stack of boxes and wondered how the pros make a floor look flawless, you are in exactly the right place. These luxury vinyl plank hacks are the same tricks seasoned installers use to avoid gaps, bumps, and squeaky boards. Whether you are redoing a single bedroom or an entire main level, a little insider knowledge goes a long way toward a floor that looks like it was installed by a crew of experts.
Luxury vinyl plank, often shortened to LVP, has become the go-to flooring choice for busy households because it is water resistant, budget friendly, and shockingly forgiving for a DIYer. But forgiving does not mean foolproof. A rushed subfloor or a misjudged expansion gap can turn a weekend project into a lifetime of regret. Stick with us, and we will walk through every trick that separates an amateur install from a showroom-worthy floor.
Subfloor Prep Secrets Every Pro Swears By
Before a single plank touches the ground, the subfloor needs to earn your trust. This is where most of the real subfloor prep secrets live, and skipping this stage is the number one reason floating floors fail early. A subfloor that looks clean to the naked eye can still be hiding dips, high spots, or old adhesive residue that will telegraph right through your new planks.
Sweep, Vacuum, Repeat Start with a thorough sweep, then follow up with a shop vacuum to pull up fine grit that brooms leave behind. Even tiny pebbles or sawdust particles can create a bump that eventually works through the vinyl surface.
The Straightedge Test Lay a long level or a six-foot straightedge across the floor in several directions. Any gap larger than three-sixteenths of an inch over ten feet should be flagged for patching with a quality floor leveling compound before you move forward.
Moisture Matters Concrete subfloors need a moisture test, especially in basements or slab-on-grade homes. A simple calcium chloride test kit or an electronic moisture meter can save you from installing over a slab that is still releasing vapor, which leads to bubbling and plank separation down the road.
Address Squeaks Now If you have a wood subfloor with squeaky spots, this is your only chance to fix them easily. Drive in a few extra screws to snug the subfloor to the joists before you cover it up for good.
Getting these details right is genuinely one of the most valuable luxury vinyl plank hacks you can apply, because a flawless subfloor is the quiet foundation behind every photo-worthy LVP installation you have ever admired online.
Mastering Click Lock Flooring Without the Frustration
Modern click lock flooring systems are engineered to snap together with minimal tools, but technique still matters enormously. The angle you use to connect planks, the order you work in, and even the temperature of the room can all affect how tightly those seams come together.
Angle In, Not Down Most click lock systems want the tongue inserted at a low angle, roughly fifteen to twenty degrees, before you gently lower the plank flat. Forcing it straight down can chip the locking mechanism and leave you with a permanently loose joint.
Let Planks Acclimate Vinyl planks expand and contract with temperature. Leave unopened boxes in the room where they will be installed for at least 48 hours so the material settles before you start locking pieces together.
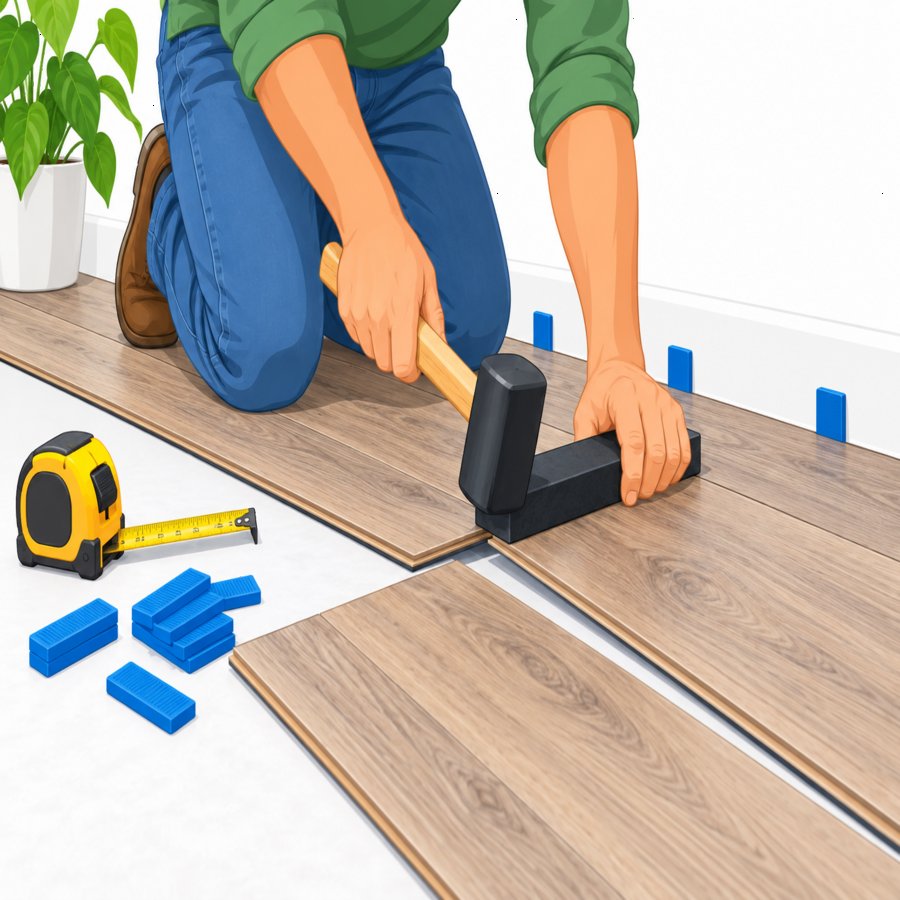
Tap Blocks Are Non-Negotiable Use a rubber mallet with a dedicated tap block to nudge end joints tight. Never strike the plank edge directly, as this crushes the delicate locking tabs and creates visible gaps that no amount of pressure will fix later.
Work the Row, Not the Piece Instead of locking each plank individually into place, click together an entire row loosely on the side, then slide the whole row into position against the previous one. This dramatically reduces seam gaps compared to working piece by piece.
Once you get the rhythm down, click lock flooring becomes almost meditative, and these small adjustments make the difference between a floor with visible seams and one that reads as a single continuous surface.
Essential LVP Floor Installation Tools Worth the Investment
You do not need a professional contractor’s trailer full of gear for a successful LVP floor installation, but a handful of specific tools will save you hours of frustration and dramatically improve your finished result.
A Quality Vinyl Cutter While a utility knife works for straight cuts, a dedicated vinyl plank cutter scores and snaps planks cleanly in seconds, with none of the ragged edges a dull blade leaves behind.
Spacers for Expansion Gaps Quarter-inch spacers placed around the perimeter of the room keep your expansion gap consistent, which prevents buckling as the floor naturally shifts with seasonal humidity changes.
Pull Bar for Tight Corners The last plank in a row often needs to be pulled into place rather than tapped, and a pull bar gives you the leverage to do that without damaging walls or baseboards.
Underlayment, Even If Pre-Attached Some LVP comes with attached foam padding, but adding a moisture barrier underlayment on concrete subfloors is cheap insurance against future warping.
Investing in the right gear up front is one of the smartest luxury vinyl plank hacks because rushed, improvised tools are almost always the hidden culprit behind crooked rows and chipped edges that show up weeks after the job looks done.
Layout Tricks That Hide Seams and Maximize Materials
Before you lock down a single row, spend time planning your layout on paper or with a simple room sketch. This upfront thinking prevents awkward slivers of plank at the walls and keeps your pattern looking intentional rather than accidental.
Stagger Like a Brick Wall Offset end joints by at least six inches between rows, and never let seams align in a repeating pattern. True randomness, achieved by working from multiple opened boxes at once, mimics the organic look of hardwood far better than a predictable grid.
Run Planks Toward the Light Installing planks parallel to the longest wall or the main light source, such as a row of windows, makes seams far less noticeable and visually elongates the room.
Mix Boxes Early Vinyl planks can vary slightly in shade between production batches. Open three or four boxes at once and blend planks as you go so any subtle color variation gets distributed evenly rather than clustered in one corner.
Plan Your First and Last Row Measure the room width and divide by the plank width. If your last row would be less than two inches wide, trim your first row narrower instead so both edges look balanced and intentional.
These layout-focused luxury vinyl plank hacks require patience during the planning stage, but they pay off the moment you step back and realize the floor looks custom designed rather than simply installed.
Navigating Doorways, Transitions, and Tricky Corners
Every room has at least one awkward spot, whether it is a doorway threshold, a closet corner, or a curved vent cover, and these details are where DIY installs often lose their polish.
Template Odd Shapes with Paper For irregular cuts around vents or pipes, trace the shape onto cardstock first, then transfer the template to the plank. This avoids wasting an expensive plank on a guess.
Undercut Door Jambs Rather than trying to cut planks to fit around a door casing, use an oscillating tool to slightly undercut the jamb so the plank slides underneath for a cleaner, gap-free look.
Use Transition Strips Wisely Anywhere flooring meets tile, carpet, or a different vinyl run, a T-molding transition strip protects the expansion gap while creating a finished visual break between spaces.
Respect Expansion Gaps at Every Boundary It is not just exterior walls that need a gap. Islands, cabinet toe kicks, and fireplace hearths all need the same quarter-inch buffer, which gets hidden later by baseboard or quarter-round trim.
Mastering these transition details is a hallmark of professional-grade work, and it is where many of the best luxury vinyl plank hacks genuinely separate hobbyists from pros who do this for a living.
Common Mistakes That Ruin an Otherwise Great Install
Even careful DIYers fall into predictable traps. Knowing them ahead of time means you can sidestep them entirely instead of learning the hard way.
Skipping the Expansion Gap It is tempting to push planks tight against the wall for a snug look, but vinyl needs room to breathe. Without a gap, floors buckle visibly during humid summer months.
Installing Over Carpet Padding or Old Adhesive Leftover carpet tack strips, staples, or sticky adhesive residue from old flooring create tiny high points that will eventually show through as bumps or cause the click lock seams to separate.
Ignoring Direction Changes Between Rooms Switching plank direction at a doorway without a proper transition often looks unplanned. Keep a consistent flow or use a clear visual break like a different tile.
Forcing Mismatched Pieces If a plank will not click together smoothly, stop and check for debris on the locking edge rather than forcing it with extra mallet taps, which can crack the tongue permanently.
Just as careful attention prevents flooring disasters, the same principle applies throughout the home. For instance, homeowners researching kitchen upkeep often discover the same kind of overlooked missteps when they read about common oven cleaning mistakes that damage appliances over time, proving that a little research before you start almost any home project pays for itself many times over.
Long-Term Care to Protect Your New Floating Floor
Once your planks are locked in and the baseboards are back on, a bit of ongoing care keeps the floor looking fresh for well over a decade.
Felt Pads Under Furniture Heavy furniture legs can dent even the toughest wear layer. Felt or rubber pads distribute weight and prevent permanent indentations.
Sweep Before You Mop Grit acts like sandpaper under foot traffic. A quick daily sweep or dry dust mop extends the life of the protective wear layer significantly.
Use the Right Cleaner Skip ammonia-based or wax-based cleaners, which dull the finish over time. A pH-neutral vinyl floor cleaner diluted in warm water is all you need for a streak-free shine.
Control Indoor Humidity Since vinyl responds to temperature and moisture, keeping indoor humidity between 35 and 55 percent helps the planks maintain their seams and shape. The Old Farmer’s Almanac offers excellent seasonal guidance on managing indoor humidity swings throughout the year, which directly benefits the longevity of floating floors.
Treat these habits as the maintenance half of your luxury vinyl plank hacks toolkit, because installation quality only gets you halfway to a floor that still looks brand new a decade from now.
Final Thoughts on Achieving a Showroom-Quality Finish
There is real satisfaction in standing back after a weekend of work and seeing a floor that looks like it came straight out of a design magazine. Every tip we have covered, from subfloor prep secrets to layout planning to long-term cleaning habits, works together as a complete system rather than a list of isolated tricks.
Take your time during the planning and prep stages, since rushing here is the single biggest predictor of a disappointing result. Slow down on your measurements, double check your expansion gaps, and trust the process even when it feels tedious in the moment.
With patience and the right approach, your floating floor installation will hold up beautifully for years, giving you a durable, water-resistant surface that handles everyday life without missing a beat. Keep these luxury vinyl plank hacks bookmarked for your next room, because once you get comfortable with the technique, every future install gets noticeably faster and more precise.