
If your walls feel flat and your rooms lack personality, you are about to fall in love with one of the most charming architectural details in home design. These scalloped trim ideas prove that you do not need a renovation budget to add serious character to your space. With a jigsaw, some paint, and a weekend, you can transform plain baseboards, shelves, and cabinets into eye-catching focal points that look custom-built.
Scalloped edges have been showing up everywhere lately, from cottagecore kitchens to modern farmhouse nurseries, and for good reason. That gentle, repeating curve softens hard lines and brings a handmade, cottage-core warmth into any room. Best of all, this is one of the most affordable forms of budget home decor you can attempt as a true beginner DIYer.
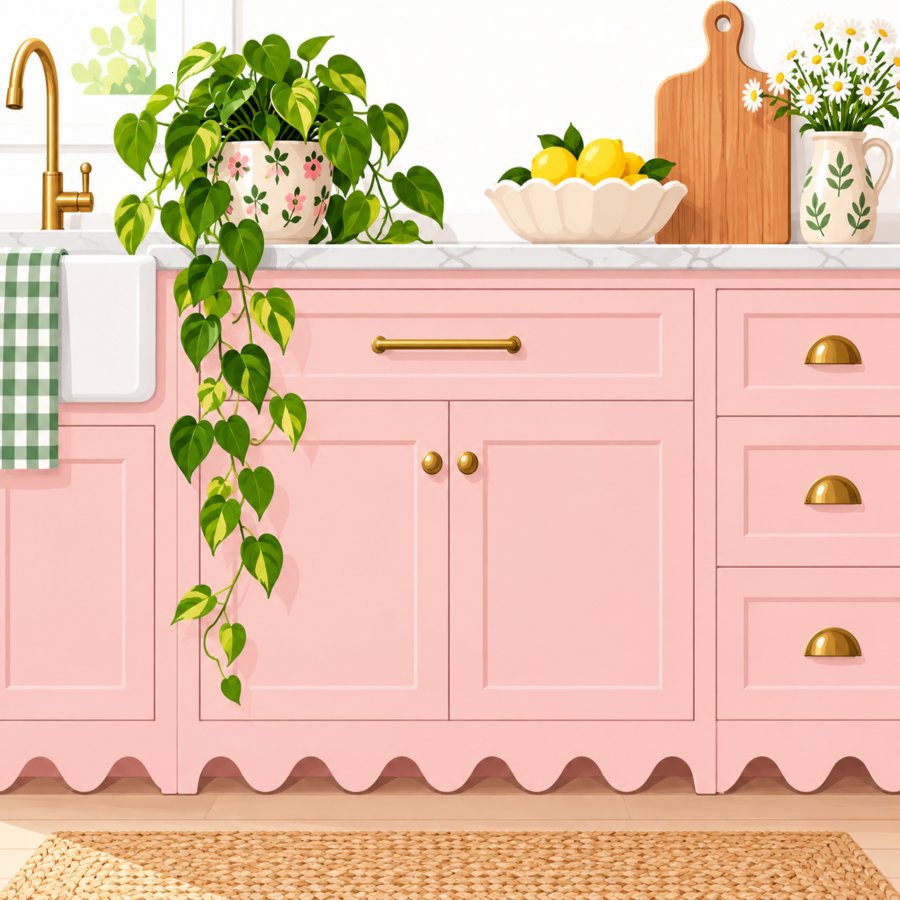
Why Scalloped Trim Ideas Are Taking Over Home Decor
There is something undeniably nostalgic about a scalloped edge. It calls to mind vintage linens, bakery awnings, and grandma’s kitchen curtains, yet it looks completely fresh when applied to modern millwork.
Designers love this trend because it delivers maximum visual impact for minimal material cost. A plain MDF board becomes a statement piece once you add a wavy, repeating curve along one edge.
The appeal of a charming edge design lies in its versatility. It works on shelf edges, cabinet skirts, headboards, mirror frames, and even ceiling medallions.
Unlike crown molding or wainscoting, which often require professional installation, most scalloped trim ideas can be executed with basic hand tools. That accessibility is exactly why home bloggers and influencers cannot stop sharing before-and-after transformations.
11 Insane Scalloped Trim Ideas for Every Room
Ready to get inspired? Below are eleven ways to bring scalloped charm into your home, organized from simplest to most ambitious.
1. Scalloped Floating Shelves Swap your boring straight-edge shelves for ones with a scalloped front lip. This is the easiest entry point into scalloped trim ideas because it requires only one small board per shelf.
2. Scalloped Kitchen Skirting Add a wavy valance beneath your upper cabinets or along an open shelf run. It instantly evokes a European farmhouse kitchen.
3. Scalloped Baseboard Trim Replace flat baseboards with a scalloped top edge for a subtle but luxurious architectural upgrade that photographs beautifully.
4. Scalloped Mirror Frame Build a plywood frame with a scalloped outer edge around a plain mirror. It is a showstopper above a console table or vanity.
5. Scalloped Headboard Upholster a scalloped-edge plywood cutout in linen or velvet for a boutique-hotel bedroom feel without the boutique-hotel price tag.
6. Scalloped Window Valance Mount a thin, curved wood board above your window frame to mimic the look of custom window treatments.
7. Scalloped Ceiling Medallion Create a round, scallop-edged disc behind a pendant light for an unexpected overhead detail that pulls the eye upward.
8. Scalloped Cabinet Doors Route or cut a shallow scallop pattern along the bottom of cabinet fronts for a bespoke, custom-built look in kitchens and bathrooms.
9. Scalloped Plant Shelf Ledge Pair a scalloped-edge ledge with trailing houseplants for a display that looks straight out of a magazine spread. If you are growing a statement plant, consider checking out this complete guide to fiddle leaf fig care to keep your centerpiece plant thriving on the shelf.
10. Scalloped Stair Riser Trim Add a scalloped detail to the front edge of each stair tread or riser for a staircase that feels like a design statement.
11. Scalloped Garden Bed Edging Take the trend outdoors by lining raised garden beds or pathway borders with scalloped wood or concrete edging for whimsical curb appeal.
Tools and Materials You Will Actually Need
The beauty of this project is how little specialized equipment it demands. Most of these tools are things you may already own or can borrow from a neighbor.
Jigsaw or coping saw This is your primary tool for cutting the actual curves. A jigsaw with a fine-tooth blade gives the cleanest result on MDF and plywood.
Round object for tracing A roll of painter’s tape, a small plate, or a compass works perfectly to trace consistent, evenly spaced arcs before you cut.
Sandpaper and sanding block Smooth curves are what sell the finished look, so plan to sand every cut edge until it feels silky.
Wood filler and caulk These hide seams, screw holes, and minor imperfections so your trim reads as seamless, professional millwork.
Paint and primer A quality primer followed by two thin coats of paint gives your scalloped trim a crisp, factory-finished appearance.
Step-by-Step: How to Create Your Own Scalloped Trim Ideas
Once you have chosen which project excites you most, the process for executing nearly any scalloped trim idea follows the same basic framework.
Step 1: Measure and mark Measure the total length of your trim piece and divide it evenly into sections. Consistent spacing is the secret to a polished, intentional look rather than a sloppy one.
Step 2: Trace your curves Using your round tracing object, draw a half-circle at each marked section so the curves connect smoothly edge to edge.
Step 3: Cut carefully Clamp your board securely and cut slowly along the traced lines. Let the jigsaw do the work rather than forcing it through the material.
Step 4: Sand thoroughly Round over every edge with sandpaper, starting with a coarser grit and finishing with a fine grit for a smooth, touchable finish.
Step 5: Prime, paint, and install Prime the raw wood, paint your chosen color, and attach the trim using construction adhesive or finish nails.
For broader guidance on classic trim proportions and traditional molding standards, the Better Homes & Gardens design resource library offers excellent reference material on balancing new details with existing architecture.
Pairing Scalloped Trim With Other Architectural Details
Scalloped trim rarely stands alone in a well-designed room. It tends to shine brightest when layered alongside other subtle architectural details that reinforce a cohesive style story.
Consider pairing a scalloped shelf edge with fluted cabinet panels or beadboard wainscoting. The repetition of texture and rhythm creates a cohesive, intentional design language throughout the room.
Arched doorways and rounded cabinet pulls also complement scalloped lines beautifully, since curves tend to echo one another across a space.
If your home leans more traditional, keep the scallops shallow and widely spaced for a restrained, classic effect. For a more playful cottage aesthetic, go tighter and deeper with your curves.
Color and Finish Tips for a Charming Edge Design
The paint color you choose can make your scalloped trim either blend seamlessly or pop as a bold accent, so think through your intention before picking up a brush.
Match the wall color Painting your scallops the exact shade as the surrounding wall creates a subtle, sophisticated texture that reveals itself gradually.
Contrast for drama A crisp white scallop against a deep green or navy wall creates striking definition and makes the trim the true star of the room.
Natural wood tones Skip paint altogether and finish your trim with clear wax or oil to highlight the wood grain for a Scandinavian-inspired, organic feel.
Whatever palette you select, this remains one of the most forgiving and affordable charming edge design choices you can make, since a small paint sample is all it takes to test your idea.
Common Mistakes to Avoid With Scalloped Trim Ideas
Even a simple project can go sideways without a bit of foresight. Here are the pitfalls that trip up most beginners.
Uneven spacing Skipping the measuring step leads to scallops of different sizes, which immediately signals a DIY misstep rather than an intentional design choice.
Skipping the sanding stage Rough, splintery edges ruin the soft, inviting quality that makes scalloped trim so appealing in the first place.
Choosing the wrong material Thin plywood can warp or splinter during cutting. MDF or solid pine typically hold curved cuts far more cleanly.
Overdoing the scale Oversized scallops on a small shelf can look cartoonish. Keep the curve diameter proportional to the piece you are decorating.
Taking your time through each stage pays off enormously, and the Old Farmer’s Almanac home and garden advice section echoes this same philosophy when it comes to any seasonal home project: patience and preparation always outperform rushing.
Budget-Friendly Shopping List for Your Project
One of the biggest draws of this trend is just how little it costs to execute well. Here is a realistic shopping list to get started.
MDF or pine board A single 1×6 or 1×8 board from any hardware store typically costs under fifteen dollars and covers a small to medium project.
Sample-size paint Most home improvement stores sell small sample pots for a few dollars, which is more than enough for trim projects.
Basic hardware Finish nails, construction adhesive, and wood filler round out your supply list for well under ten dollars combined.
Altogether, most of these scalloped trim ideas can be completed for less than thirty dollars, making this one of the highest-impact, lowest-cost upgrades in the entire world of budget home decor.
Bringing Scalloped Charm Into Your Garden and Outdoor Living Spaces
Do not limit this trend to indoor trim work. Scalloped detailing translates beautifully to outdoor living areas and garden structures as well.
Try adding a scalloped fascia board along the edge of a pergola or porch roofline for a cottage-style silhouette visible from the street.
Scalloped planter box edges also pair wonderfully with lush, trailing greenery, softening the hard lines of raised beds and container gardens.
When planning outdoor woodwork, always choose exterior-grade primer and paint, and consider sealing cut edges to protect against moisture and rot over time.
For guidance on selecting durable, climate-appropriate plants to pair with your new scalloped garden edging, the USDA plant hardiness resources can help you choose species suited to your exact growing zone.
Whether you start with a single floating shelf or commit to a full staircase transformation, these scalloped trim ideas prove that character does not require a contractor or a huge budget. All it takes is a steady hand, a little patience, and a willingness to add a touch of whimsy to the everyday corners of your home.